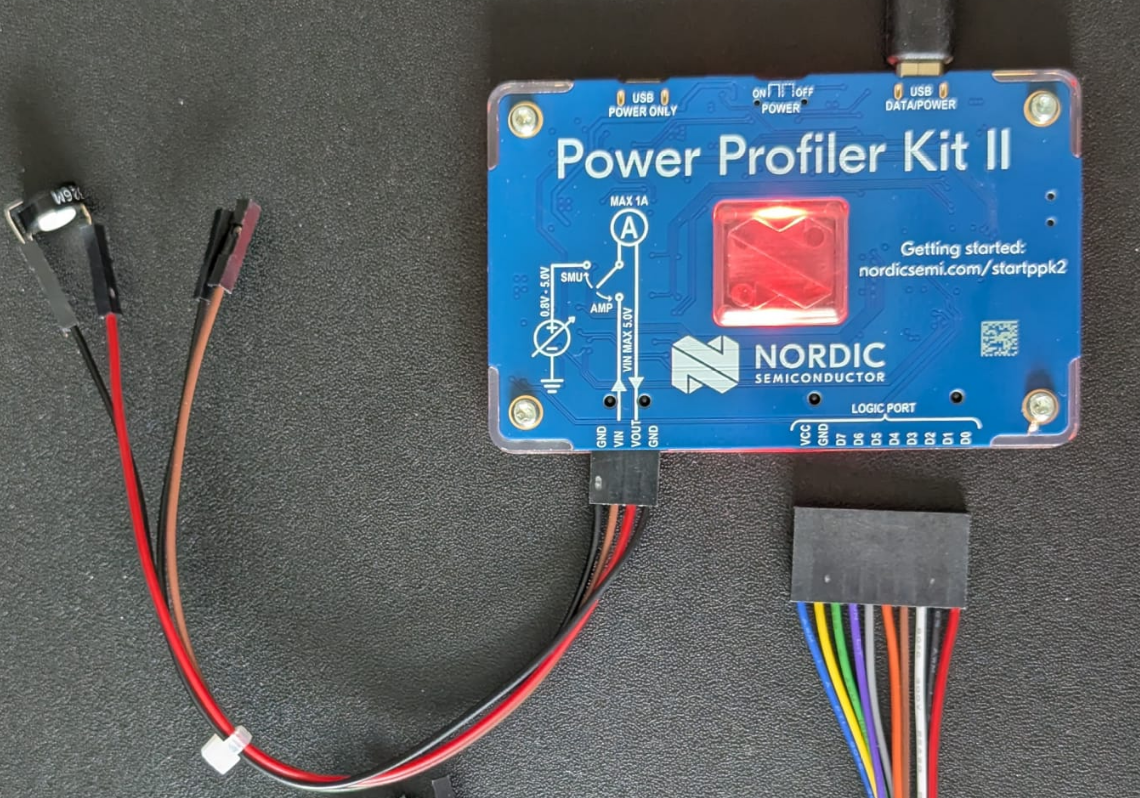
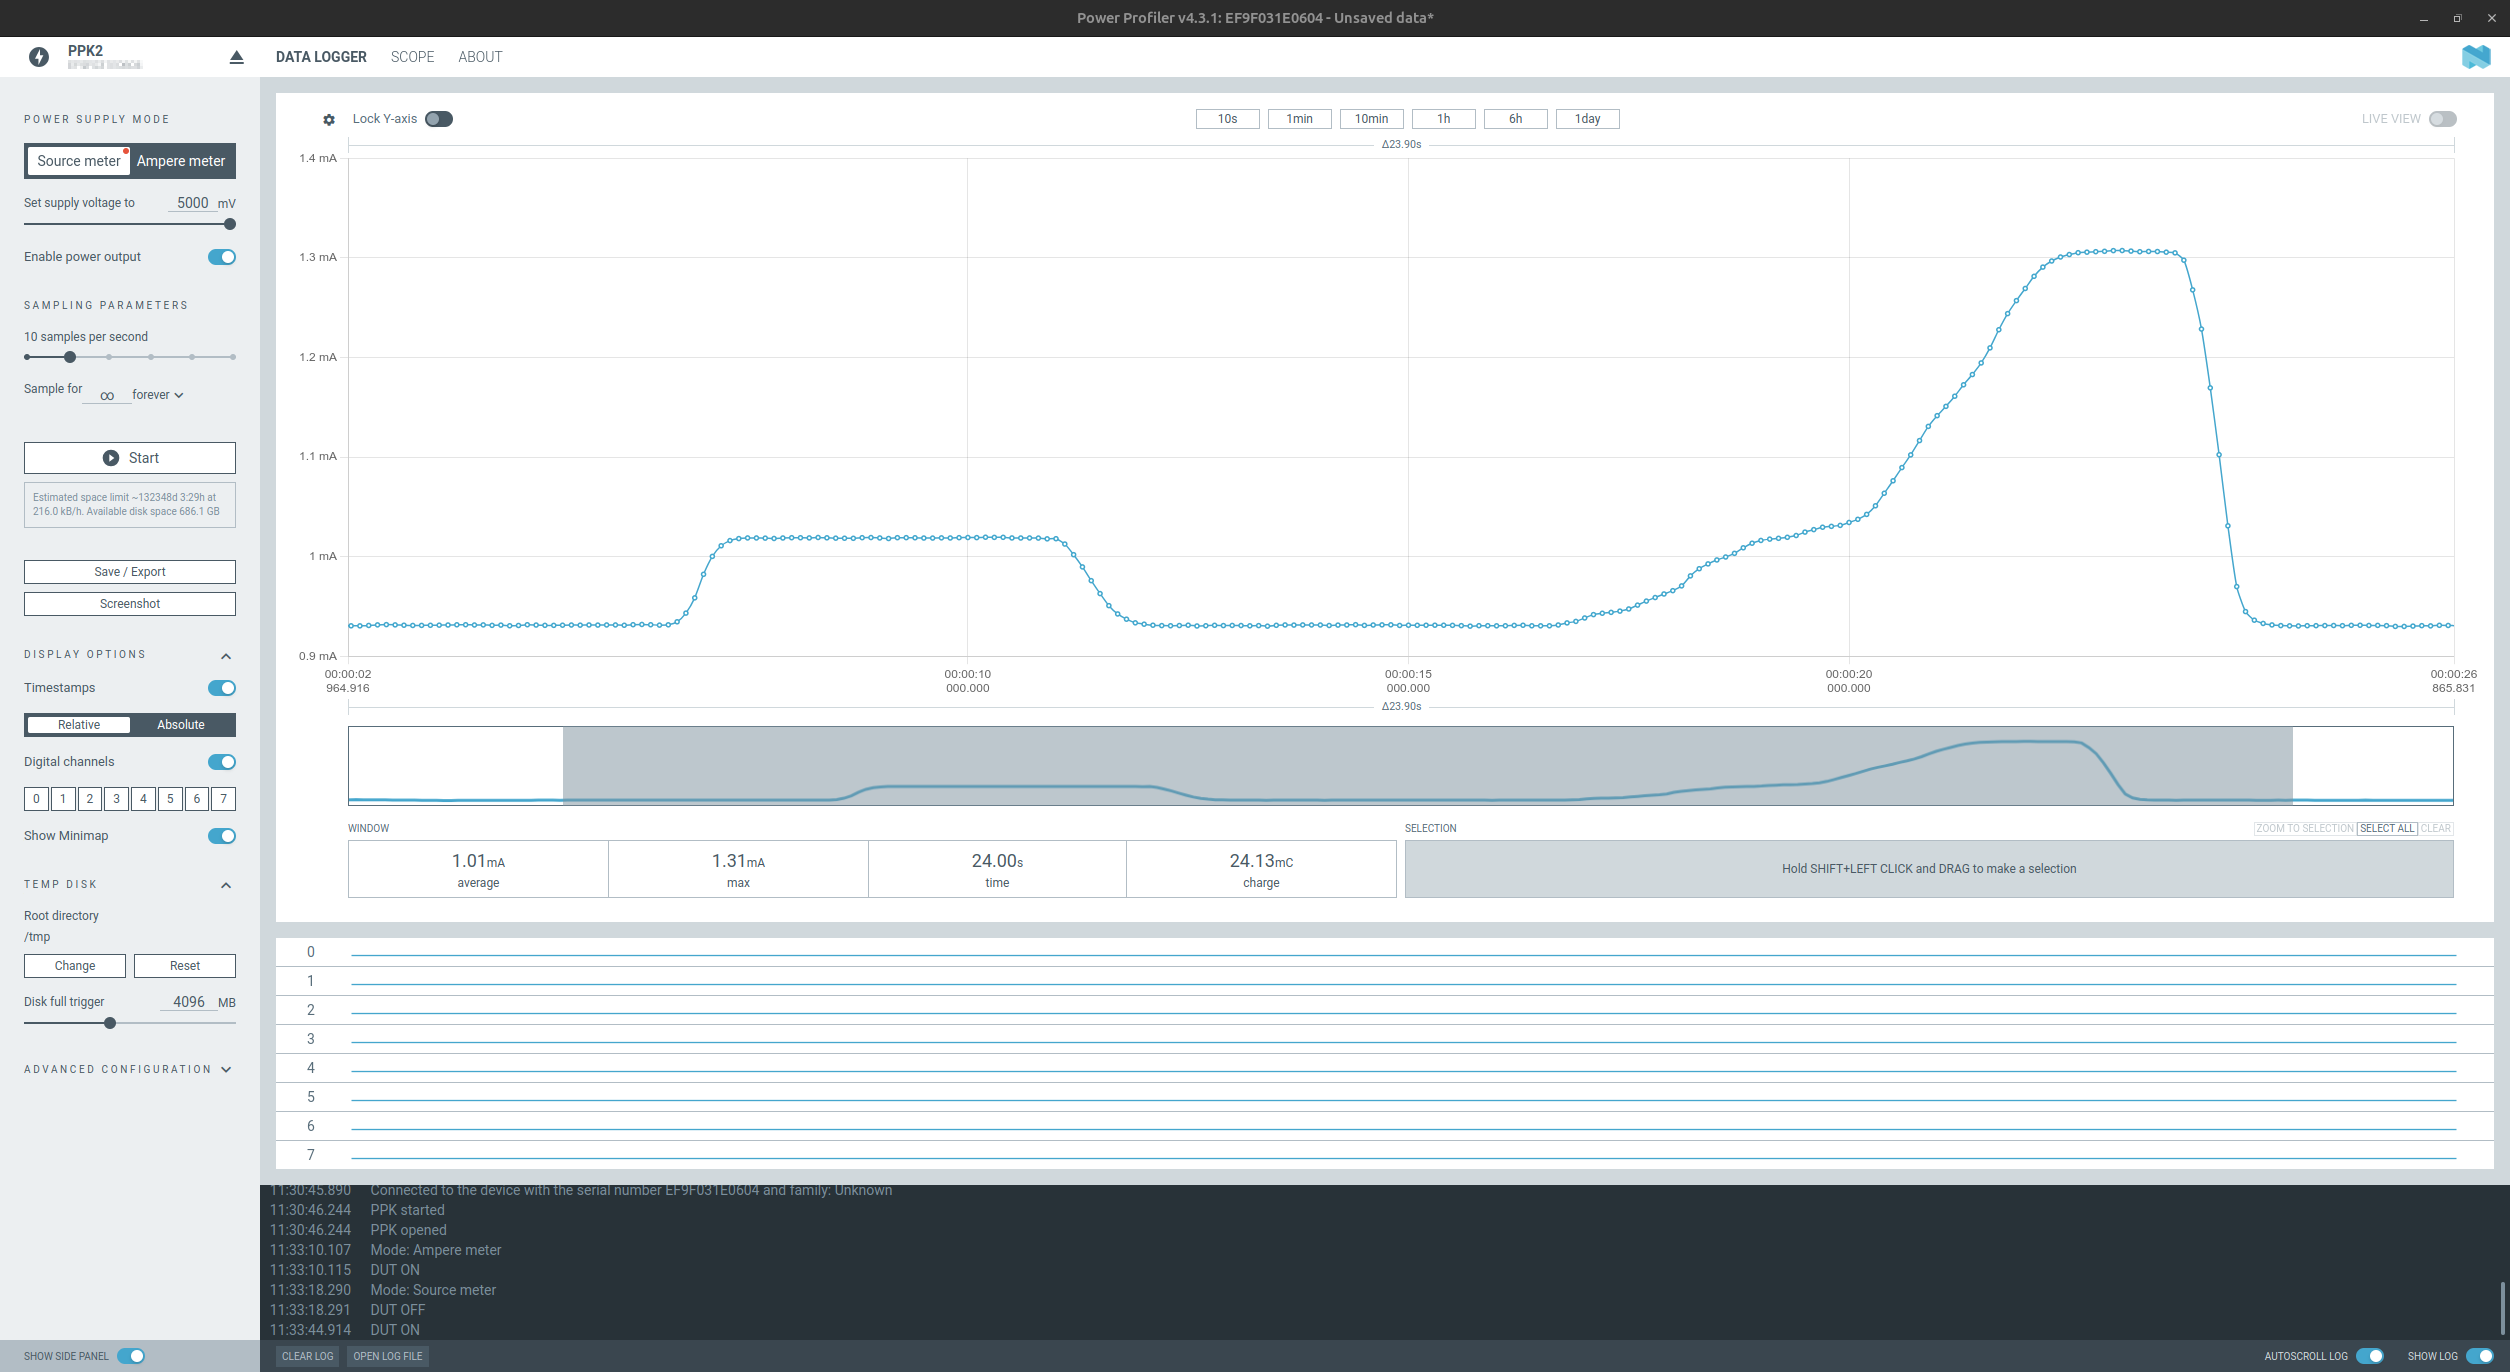
For some of the next TōGō-Lab projects I’m thinking about, I want some gear that lets me look properly into the very low-power usage of my builds instead of just guessing. Besides some more expensive gear like the Joulescope, I finally bought Nordic’s Power Profiler Kit II, which looked like a very good fit for the kind of measurements I want to do. Nordic positions the PPK2 as a standalone power-measurement and power-optimization tool for embedded hardware, with support for real-time current measurements and use with both Nordic boards and external hardware.
As typical for some lab gear, it runs nicely under Windows, in my case in a virtual Win10 setup. But I wanted it on my actual Linux workbench machine, where the rest of the lab IT frontend for my tools lives. That part was a bit more difficult than expected. Nordic gives you an AppImage, but it is a little bit tricky to get it running.
Since I’m currently in the process of redesigning and updating the setup of my electronics lab, I no longer want to keep Windows around just to run my electronic load I own now for 10 years: The famous MightyWatt.
So this fork moves the project where it fits better to my actual lab setup: Into my Linux environment, closer to my usual tools, and I hope much easier to automate. The current focus is the CLI backend. That is the useful part for headless operation, scripting, CSV logging, JSON-driven test runs, and remote access. A GUI may come later, but only as a second layer. First the engine, then maybe the dashboard. The name 電力番長 (Denryoku Banchō) fits that idea well: the CLI sits on the hardware, owns the usb link, and acts as the boss in the background.
But first: A big thank you is due to the original MightyWatt developer, Jakub Polonský (kaktus85) whose MightyWatt repositories remain the foundation this work builds on. The original GitHub project pages are here: MightyWatt (that’s the one I own) and MightyWatt R3.
This blog post will be updated as the project progresses. Beta 0.1 is now available in my Gitea repository. It is already running, but it still needs proper testing in the next stages of the project.
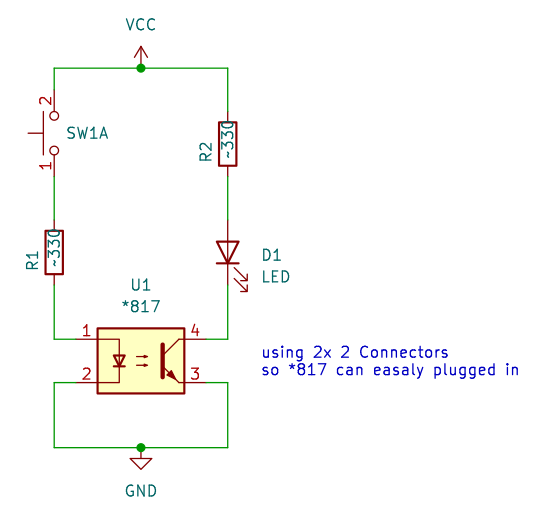
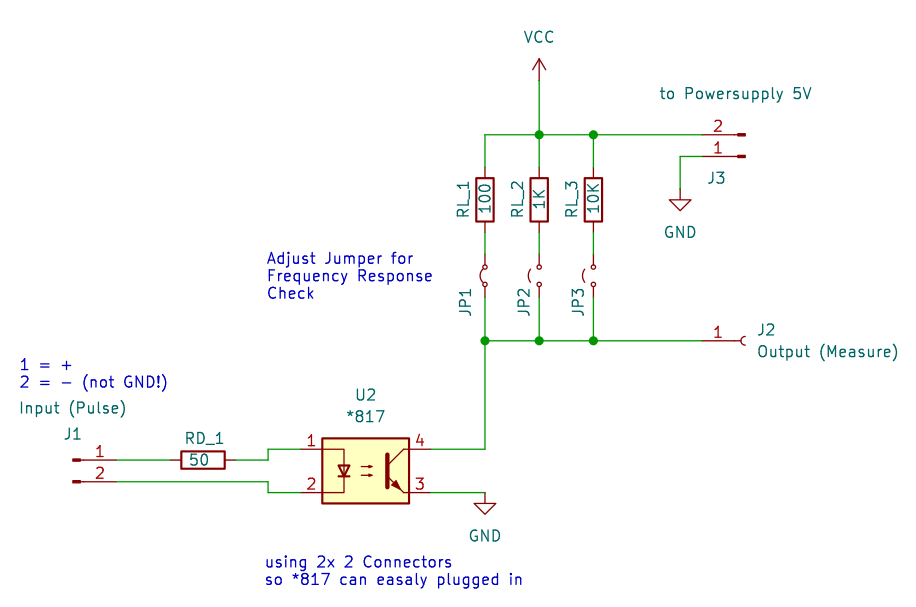
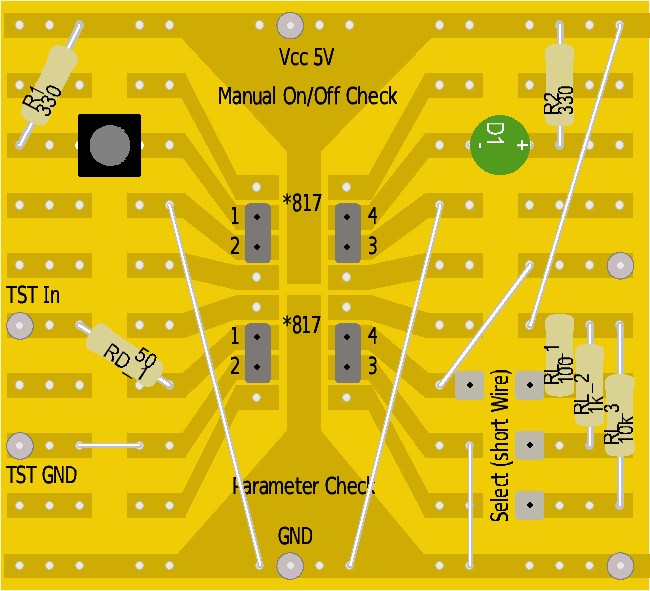
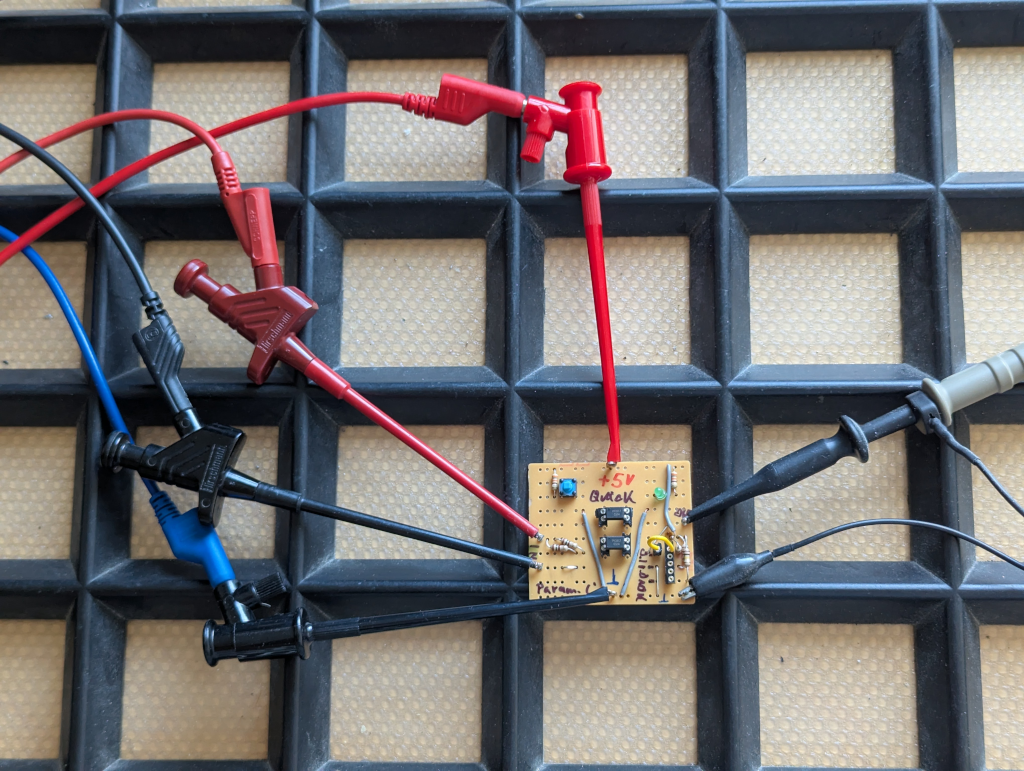
For some upcoming projects, I’ll use the PC817 optocoupler family. But sadly, you don’t always get what you think you’ve bought. So how can you simply check if they work as described in the datasheet? I wanted a quick way to verify parts before building them in.
This small tester consists of two independent circuits, runs on 5 V, and does two simple things:
Quick Test – Push the switch, and if the LED lights, the optocoupler basically works.
Frequency Test – Based on the circuit from the datasheet. Input impedance is 50 Ω, and the output can be pulled up with 100 Ω, 1 kΩ, or 10 kΩ to see how the device behaves at different frequencies.
Simple stripboard:
That’s it.
It’s not meant to be fancy—just a tiny 2-hour project to get reliable data and a feel for how different PC817 batches respond.
The project data will be on Gitea – ToGo-Lab, Project ID 0002,
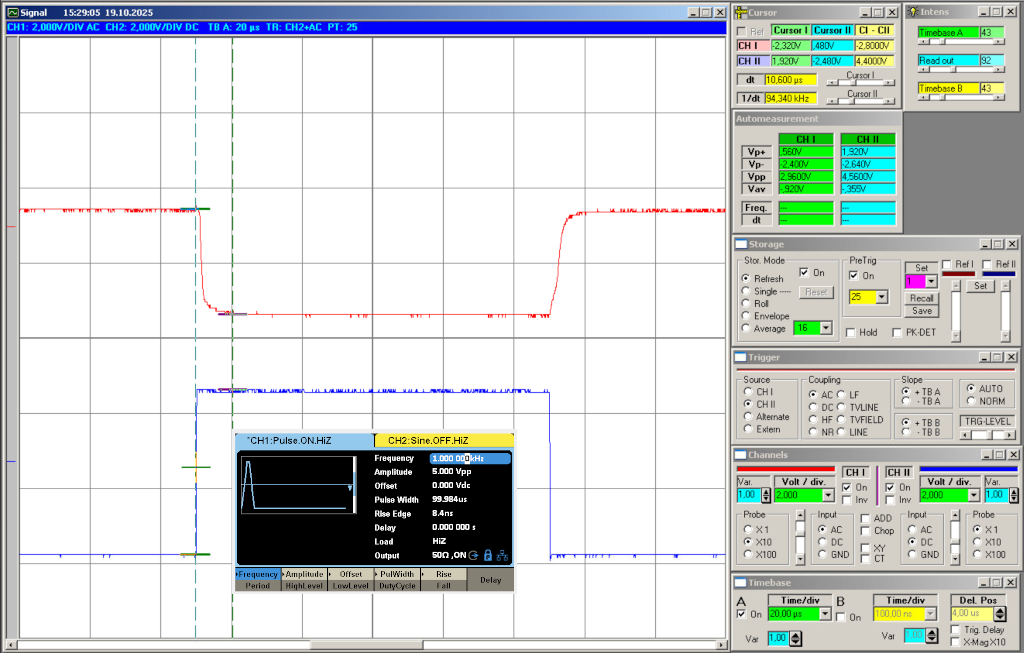
As working proof, some simple scope screenshots:
If you’re into optocouplers or small test circuits, feel free to build along or suggest tweaks.
Always happy to hear what others find useful in their own setups. 🙂
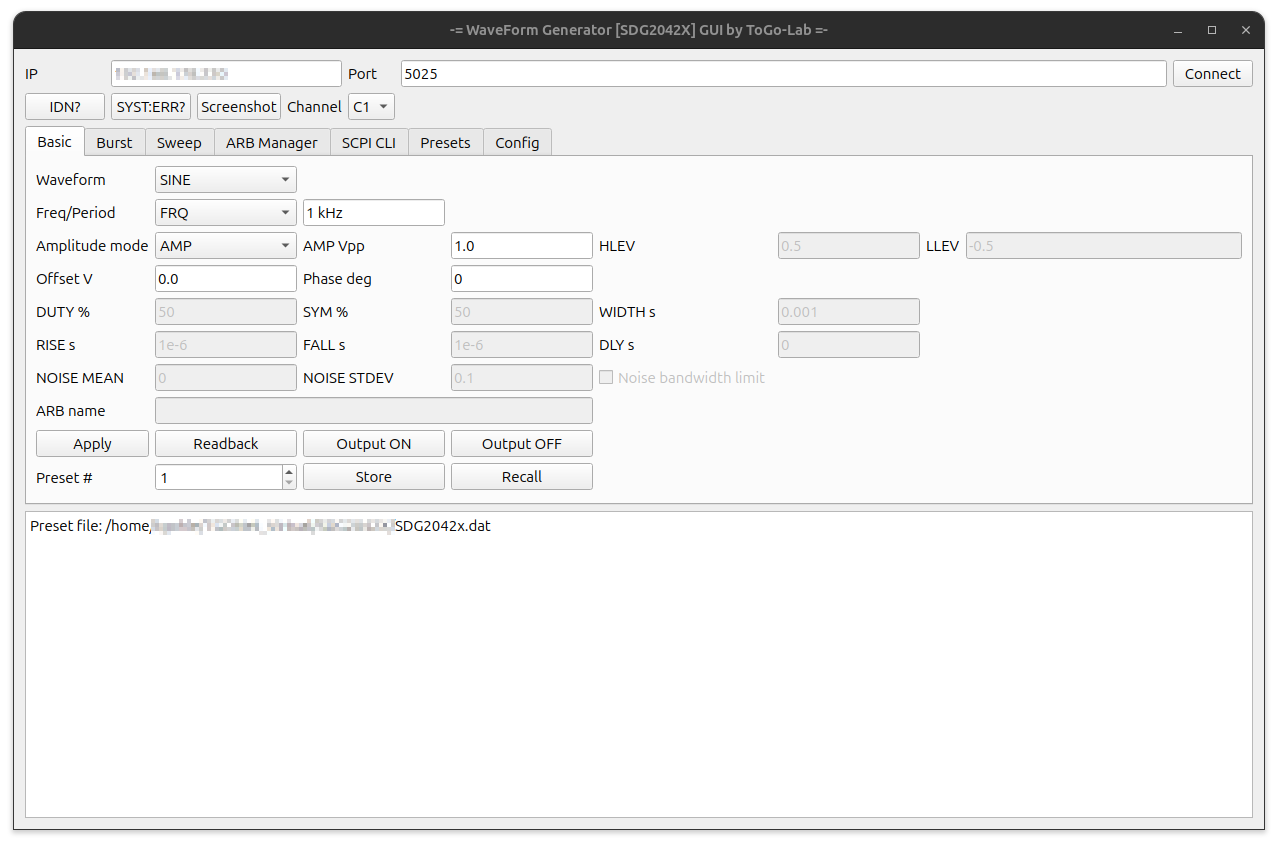
As part of rebuilding my electronics test bench for future projects at ToGo-Lab, I wanted a simple way to control my Siglent SDG2042X remotely from my Ubuntu box. So I wrote a small PyQt5 GUI script.
In its current state, the script lets you:
Select waveform, amplitude, frequency, and DC offset
Run sweeps, bursts, or arbitrary waveforms
Save and recall up to 10 presets (you can also recall directly from the generator)
Use the ARB Manager to download waveforms from the generator or upload new ones (not fully tested yet!) – it also shows the waveforms currently stored
Send direct SCPI commands through a built-in CLI
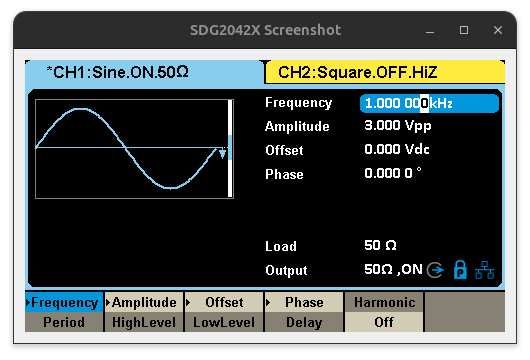
Grab screenshots from the generator display (saved in the same directory as the script)
Use it as-is or tweak it for your own setup. Programming in Python and PyQt5 isn’t my main profession -(I’m more of a hardware guy) so if you try it and find bugs (there will be some), I’d love to hear from you.
The program talks to the SDG2042X over a simple socket connection on port 5025 using SCPI commands.
You can call the script with the -ip parameter (try also --help). This is handy if you launch it via a .desktop file.
The functions are straightforward, so there’s no detailed documentation yet. I hope most of the features are self-explanatory. Each GUI tab covers one main function. See more details in the Gitea repo:
Basic: Waveform, frequency, amplitude, offset, phase, and output control
Burst: Configure burst mode, trigger source, cycles, and delay
Sweep: Set up linear or logarithmic sweeps, start/stop frequency
ARB Manager: List, upload, and download arbitrary waveforms (still experimental)
SCPI CLI: The command-line interface for direct SCPI communication
Presets: Store and recall up to 10 custom setups; presets are saved in a text-based .dat file. This tab is especially useful: You can adjust settings directly on the generator, then read them back and save them as presets. The file is easy to edit manually if needed.
You can take screenshots at any time. They’re stored as .bmp files in the working directory, with the date and time included in the filename.
Update 2025-10-25
My SDG2042X Python control GUI keeps moving forward. Today I spent a lot of time reviewing and rewriting parts of the code. My focus was on stability & usability, and making the tool to fit better into my idea of a remote controlled test bench setup.
Today’s update:
Context-aware Basic Tab
The parameter fields now change automatically depending on the selected waveform.
So if you choose SINE, SQUARE, RAMP, PULSE, NOISE, ARB, or DC, you’ll only see the options that actually matter, others are grayed out.
Improved SCPI Reliability
I added a new query_retry() function and a socket drain, which makes communication with the generator more reliable. This prevents annoying timeouts when running queries like OUTP? or BSWV?.
The default socket timeout has also been set now to 4 seconds to give things a bit more breathing room (especially the screenshots are very slow). This makes it a little bit laggy but with shorter time I get sometimes errors. Adjust with care if you want a shorter response time.
Config System
There’s now an SDG2042x.config file where you can define paths for presets and screenshots (simple text file).
The pathes for presets and schreenshot directory are accessable from the “Config” tab.
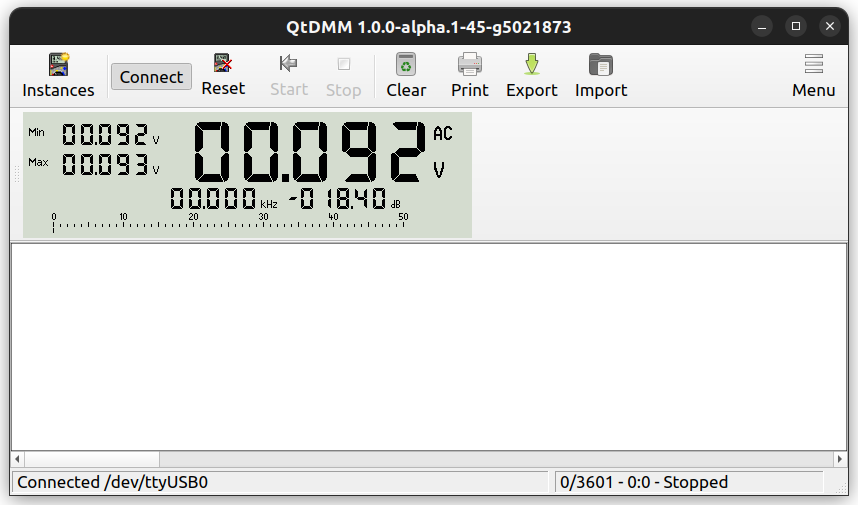
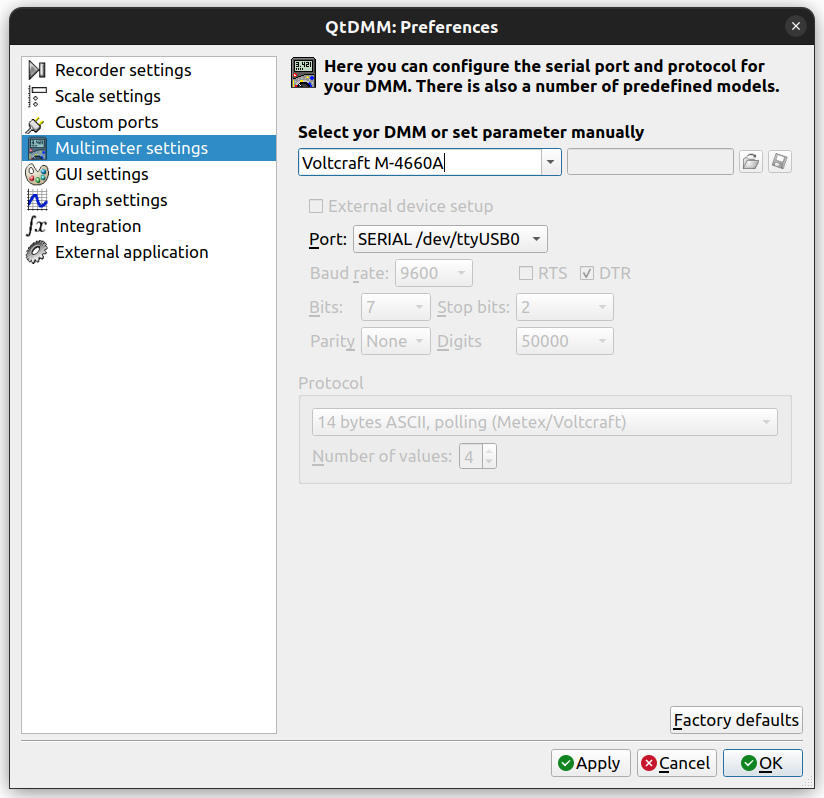
I pulled my veteran DMM, a Voltcraft MXD-4660A, from the drawer to set up my workbench (adding a serial-to-USB converter) and gave it a second tour of duty with QtDMM on Ubuntu. After a bit of searching online what to use under I found the QtDMM project at http://www.mtoussaint.de/qtdmm.htmlm , but appears abandoned. The active fork, I think, is at https://github.com/tuxmaster/QtDMM.
Here’s the final install and setup for my lab computer running Ubuntu 22.04 (Jammy):
# run from the same build dir used for the install
sudo xargs rm < build/install_manifest.txt
Troubleshooting:
If you hit errors, try a clean build reset instead of first searching forums.
I learned the hard way to make a clean install as a belt-and-suspenders reset, that deletes built objects but keeps the CMake cache.
“|| true” lets the sequence continue even if the clean step fails due to a broken config.
“rm -rf build CMakeCache.txt CMakeFiles” force-removes any stale out-of-source build dir and any accidental in-source CMake cache:
“Final ./compile.sh” does a fresh configure and build: